As I mentioned in an earlier post, the boys have a game themed-room. Brett is a proud “Euro-Gamer”. He has a staggering collection of board games and has started the boys on their own collection as well. Urban absolutely loves board games, so it seemed like a natural fit.
 One of the key icons of the Euro-gaming community is the Meeple. Which, for those of you not familiar with them, is a person-shaped game piece carved out of wood that is used in games like Carcassonne. The other iconic piece that we chose to highlight was the six-sided die. As a wife of a Class-A, Self-Proclaimed Gaming Geek, I assure you there is no shortage of dice (polyhedral and other wise) in our house.
So, naturally, we decided that we really wanted to use some of them as drawer pulls. However, the meeple things are tiny! The XL versions are only 19mm. So, I had to put my thinking cap on. After a few internet searches, I decided to visit my friendly, neighborhood Michael's to see what they might have to help me out.
And I totally scored!! I ended up getting a dozen people shapes and a bag of cubes (to make dice). I also picked up a bag of small spools. The plan was to glue the objects to the spools to create a nice shaft for the pull. So, here is the process step by step.
I started out by laying out the spools on a board. I used Elmer's Glue-All Max for wood, stone and metal which meant the my "porous" wooden surfaces needed to by moistened before applying the glue. I used a damp rag to wet the adhering surfaces.
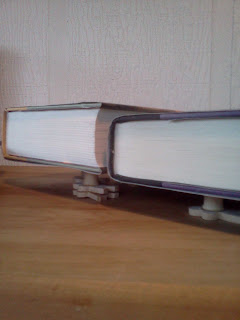
Then I applied a generous amount of glue. It's kinda weird because it stays very wet for quite a while. You need to let it set up for 1-4 hours and it's kinda smelly, so I did this out on the porch after the boys went to bed. You also are supposed to apply pressure throughout the drying process. I don't have 20 little tiny clamps (maybe you do), but I just lined them up like little soldiers and put books 3, 4 and 5 of the Harry Potter series to an alternate use. They've already been read by a handful of people... it's time they start earning their keep.
After letting the pieces stand overnight, the glue was thoroughly set, and I sat down to paint. This was a noble idea, but proved to be a little more difficult than expected, since unlike the night before now both Beringer and Urban were awake. Urban was a bit easier to distract as I sat him down with a bunch of spare pieces and a paint brush. Beringer, on the other hand entertained himself by removing all the screws from our folding chairs. (They were destined for the dump anyway, but still...)
I chose three bright shades of orange, apple green and aqua from the Craft Smart line of acrylic paints at Michael's. The paints went on nicely even over the unfinished wood. I did two coats on each to make sure they were really bright.
I let the pieces dry, and then added white dots to the "dice" pulls. While my dots dried, I ran to Home Depot to look for new screws. Since I was using the pre-drilled spools for my shafts, I needed to get screws that we closer to 1/4" diameter. The screw and bolt aisle of Home Depot is a little overwhelming for a non-carpenter like me, but I finally made it through with only a few odd looks as I strategically inserted screws of varying diameters into the back-end of a neon green little man. I found a perfect fit and headed home.
Then the fun really began. I think I was almost too exact with the fit on my screw because they were a little "tight". I ended up busting off about half of the dice from their spools trying to affix them to the drawers. So, once the spool was in place I was breaking out the Glue-All Max and my library of big books again to reattach them.
This is just one of them in place. You'll have to wait to see the finished piece until I post the whole room. ::grin::
Although there are things I would do differently a second time (larger cubes for the dice, for one.) I would definitely do this project again. It was fun! And I like the custom feel they add to the room. So, once the pictures are hung and I figure out the best way to showcase my vintage game boards, you will see the completed look. Until then...


No comments:
Post a Comment